Ultimate Guide to Garage Door Opener Installations
")
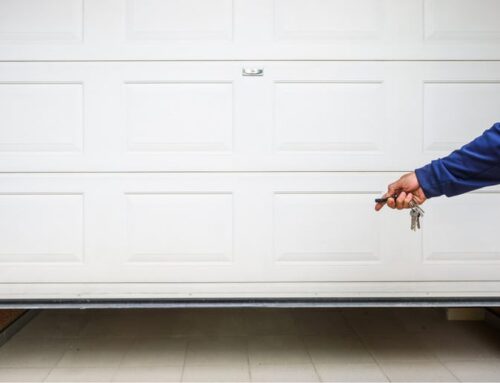
Garage door openers play an important role in home safety. An opening system that functions well will provide smooth operation. It will prevent the door from falling accidentally and causing damage and injuries. It will ensure the door closes completely to prevent break-ins.
The opener must be high quality, but the installation makes all the difference. The opener must be properly installed to ensure optimal functionality. Read on to learn more about garage door opener types and how to install garage door opener.
Types of Garage Door Openers
There are various types of garage door openers to choose from. Your options include:
- Chain Drive: A chain drive garage door opener uses a chain to move the garage door up and down its track. It is best for insulated, wooden, and heavy doors. It is durable and strong and fits most garage doors. However, it is noisy and requires considerable maintenance.
- Belt Drive: Belt drive garage door openers are similar to their chain drive counterparts but they use a belt instead of a chain to move the garage door. They are quieter than other garage door openers. They also work on various doors, including those that are light, heavy, multi-panel, and one-piece. However, they are also expensive, high maintenance, and have a shorter lifespan than other openers.
- Screw Drive: Screw drives feature a metal rod that works like a screw when the door opens and closes. It is quiet, moderately priced, and low maintenance. On the downside, it is noisy and not suited for heavy doors. It also requires ongoing lubrication and may experience issues with fluctuating temperatures.
- Direct Drive: Direct drive garage openers feature a gear wheel that moves a motored trolley along a fixed chain. It is ideal for tall garage doors and it is a low-maintenance option. However, it is more expensive than other garage door openers. It is also less popular than other openers and may be harder to find.
Tools and Materials Needed for Garage Door Opener Installation
Some people choose to reduce their garage door opener installation cost by doing their own installation. The cost to install garage door opener can be expensive and it can be a DIY job, but you must research carefully to ensure safe operation. In these next sections, we will explain what tools are required, and the steps you must take.
Garage door opener installation typically requires the following tools:
- Electric drill and bits
- Adjustable wrench
- Socket wrench set
- Screwdrivers (slotted and Phillips)
- Hammer
- Safety goggles
- Gloves
- Tarp
You may also need the following:
- Hacksaw
- Wire stripper
- Stud finder
- Laser Level
Most people will have the basic tools in their toolbox. Additional tools should be available at your local hardware store. If the garage door opener installation cost is high because it requires an expensive tool you don’t have at home and won’t use often, consider renting or borrowing.
Pre-Installation Preparation
Before you begin the installation, most DIY garage door opener installers will want to take precautions to ensure safety. You should have goggles and work gloves to protect your eyes and hands. You may also want to spread a tarp out under the work area to keep it clean.
Step-by-Step Installation Process
Assemble and Mount the Carriage Tube
- Assemble the carriage tube according to manufacturer instructions.
- Mount it to the front of the power unit.
- Attach the rail clamps to connect them to a bracket above the door. Some additional switches and wiring may be required.
- Mount the carriage onto the carriage tube following the manufacturer’s instructions.
Mount the Header Bracket
The mounting bracket attaches the carriage tube to the wall above the door. It is usually in the center of the wall, but positioning can vary.
- Manually lift the garage door to its highest point. Mark the door at this height, then make another mark two inches above it.
- Line up the header bracket with the top line and attach it to the wall with the recommended fasteners.
- Attach the free end of the carriage tube to the header bracket. The power unit should be resting on a pad to prevent scratching.
- Once the carriage tube and header bracket are attached, raise the power unit and set it on top of a ladder close to the ceiling.
Hang the Power Unit from the Ceiling
In most cases, angle irons and metal scraps will be needed to hang the power unit.
- Use lag screws to bolt the angle irons into the rafter.
- Use hex-head screws to secure the angle irons to a rafter.
- Use your hardware to attach the straps to the power unit.
- Open and close the garage to ensure it clears the openers.
- Follow the manufacturer’s directions to attach the wires for the opener control box and mount it to the garage wall. The unit should be installed at a convenient height for household members and should allow the wires to reach the power unit.
- Run the control box wires up the wall and across the ceiling to reach the power unit. Attach them according to the manufacturer’s instructions.
Attach the Carriage Arm Bracket
The carriage arm is a metal piece that connects to the bracket mounted on the garage door. It allows the carriage to raise and lower the door.
- Attach the connecting bracket to the garage door according to manufacturer instructions.
- Use the supplied fasteners to attach the carriage arm to the carriage body.
- Use the supplied fasteners to attach the elbow-shaped piece to the door bracket. Connect the elbow to the main carriage arm.
Plug in the Safety Device
The safety device will shut down the motor if the door encounters an obstruction. It consists of two sensors that throw a light beam across the garage threshold. If the sensors detect an object, the garage will automatically reverse and open.
- Align the sensor mounts using a laser level. The sensors should be no more than six inches from the ground.
- Mount one device on each side of the door.
- Run the sensor wires along the garage walls and ceiling. Most kits provide fasteners that you can use to secure the wires. Attach them as directed.
- Test the doors. Make adjustments if necessary.
Additional Features and Accessories
Several accessories and features will enhance your garage door opener’s functionality. You can get a smart system or integrate add-on accessories.
A smart system connects to your wireless system and can tell you if your garage door is open, shut, or somewhere in between. It can also provide information on access history.
You may also consider getting the following accessories and add-ons for your system.
- Mounted Control Panels: Wall-mounted garage door openers do not feature any chains or belts so they are easy to maintain. They also take up minimal space and do not consume real estate on the floor or ceiling.
- Wireless & Keyless Entry: Wireless and keyless entry provides added safety. It allows you to open your garage without a key or remote. You can use a unique code to open your garage door and share it only with people you trust.
- Remote Lighting: A remote lighting system will turn the garage lights on when you step out of the car so you can safely navigate your way into your home.
Garage Door Opener Installation Troubleshooting and Maintenance
Several issues may occur after garage door installation. Here are some to be aware of.
- The Opener is Not Located Near an Electrical Outlet: If you find the garage door opener is not located near an electrical outlet, you may have to install one or get one installed.
- The Sensors are Not Working: The garage door sensors may not be working because they are not properly aligned or they may be blocked by dirt and debris. Clean and adjust the sensors to ensure they are working properly.
- Garage Isn’t Opening or Closing Properly: If the garage is not opening or closing properly after your garage door opener installation, you may need to call in an expert.
You should also follow up with regular maintenance to ensure your garage door opener withstands the test of time. The following tips will ensure a long life.
- Lubricate: Lubricate your garage door parts and opener to ensure they are operating smoothly. Lubricate the rollers, bearings, and hinges once a year and the garage door rail opener every 3-4 years.
- Check the Door’s Balance and Autoreverse Features: Check the garage door’s opening functionality and autoreverse features once a month. Disconnect the door from the opener to ensure it operates smoothly under manual operations. Place an object under the door to check its autoreverse system.
- Maintain the Opener Remote: Change the remote batteries regularly. Ensure the device is programmed correctly to avoid hiccups.
Raynor Will Take Care of Your Garage Door Opener Installation Needs
Many people choose to DIY their garage door opener installation to reduce garage door opener installation cost. The task is doable, but if you feel unconfident, you may prefer to hire a trained expert. A professional will ensure your installation runs safely and smoothly and may save you money in the long run.
Raynor is a trusted name in garage doors. Our expertise comes from 40 years in the industry. We provide garage doors, service, and repairs that you can trust.
Contact us for all your garage door opener installation needs.